Android开发笔记:编写运行第一个手机程序如此简单
我与Java
大二的时候,修过Java的选修课,考了90多分。虽说如此,但一直以来,我的Java水平仅停留在只会写一个简单的Hello world。可能是我对Java一向没有什么好感,平时也不会用到它!Kubuntu里的OpenJDK和Eclipse,都是为了交作业而安装的:)
开发环境配置
昨天就搭建好了Android开发环境了。我发现我之前安装的Eclipse Galileo版本是安装不了官网上下载的ADT插件的。所以,我被迫去Eclipse官网重新下载了最新的Eclipse Indigo Classic 3.7.1。问题解决了。另外,用OpenJDK代替Sun JDK完全没有问题!
开发环境的搭建参考官网的详细教程:
http://developer.android.com/sdk/installing.html
参考这篇教程,我在Android模拟器上成功运行了一个的Hello world:
http://developer.android.com/resources/tutorials/hello-world.html
一个选择题程序
在Hello world的基础上,稍加修改,做了一个简单的选择题程序。得益于Eclipse便捷的UI编辑工具,像堆砌积木一样,不到1分钟就做好了界面!请大家无视界面内容,以免影响你的情绪。
界面的XML配置内容如下,在按钮里,指定了响应onClick事件的函数。
<?xml version="1.0" encoding="utf-8"?>
<LinearLayout xmlns:android="http://schemas.android.com/apk/res/android"
    android:layout_width="fill_parent"
    android:layout_height="fill_parent"
    android:orientation="vertical" >

    <TextView
        android:layout_width="fill_parent"
        android:layout_height="wrap_content"
        android:text="@string/question" />

    <RadioGroup
        android:id="@+id/radioGroup1"
        android:layout_width="wrap_content"
        android:layout_height="wrap_content" >

        <RadioButton
            android:id="@+id/radio0"
            android:layout_width="wrap_content"
            android:layout_height="wrap_content"
            android:checked="true"
            android:text="小虾" />

        <RadioButton
            android:id="@+id/radio1"
            android:layout_width="wrap_content"
            android:layout_height="wrap_content"
            android:text="iceboy" />

        <RadioButton
            android:id="@+id/radio2"
            android:layout_width="wrap_content"
            android:layout_height="wrap_content"
            android:text="小白" />
    </RadioGroup>

    <Button
        android:id="@+id/button1"
        android:layout_width="wrap_content"
        android:layout_height="wrap_content"
        android:text="确定"
        android:onClick="clickOK"/>

</LinearLayout>
在Activity代码里给按钮加入响应事件,打完代码,按Ctrl+Shift+O自动补全import,Eclipse的代码补全强大的惊人。
完整的Activity代码如下:
public class HelloAndroidActivity extends Activity {
    /** Called when the activity is first created. */
    @Override
    public void onCreate(Bundle savedInstanceState) {
        super.onCreate(savedInstanceState);
        this.setContentView(R.layout.main);
    }

    public void clickOK(View view){
    	RadioGroup rg = (RadioGroup)findViewById(R.id.radioGroup1);
    	int id = rg.getCheckedRadioButtonId();
    	String text = "";
    	switch(id){
    	case R.id.radio0:
    		text = "你太聪明了!";
    		break;
    	case R.id.radio1:
    	case R.id.radio2:
    		text = "你太愚昧了!";
    		break;
    	}
    	new AlertDialog.Builder(this)
	    	.setTitle("结果")
	    	.setMessage(text)
	    	.setNeutralButton("Ok", new DialogInterface.OnClickListener() {
	    		public void onClick(DialogInterface dialog, int which) {
	    			dialog.dismiss();
	    			HelloAndroidActivity.this.finish();
	    		}
	    	}).show();
    }
}
按钮事件由clickOK函数响应,判断RadioGroup中被选中的按钮ID,使用AlertDialog输出提示结果信息。
这个AlertDialog的show方法不会阻塞当前线程,而弹出的对话框的按钮响应事件是异步的。
使用Activity的this.finish();方法来退出程序。不过这样做好像没有结束进程,请教Java大牛,如果要结束进程,是使用System.exit()不?
模拟器运行
使用SDK自带的模拟器运行的效果:
手机运行
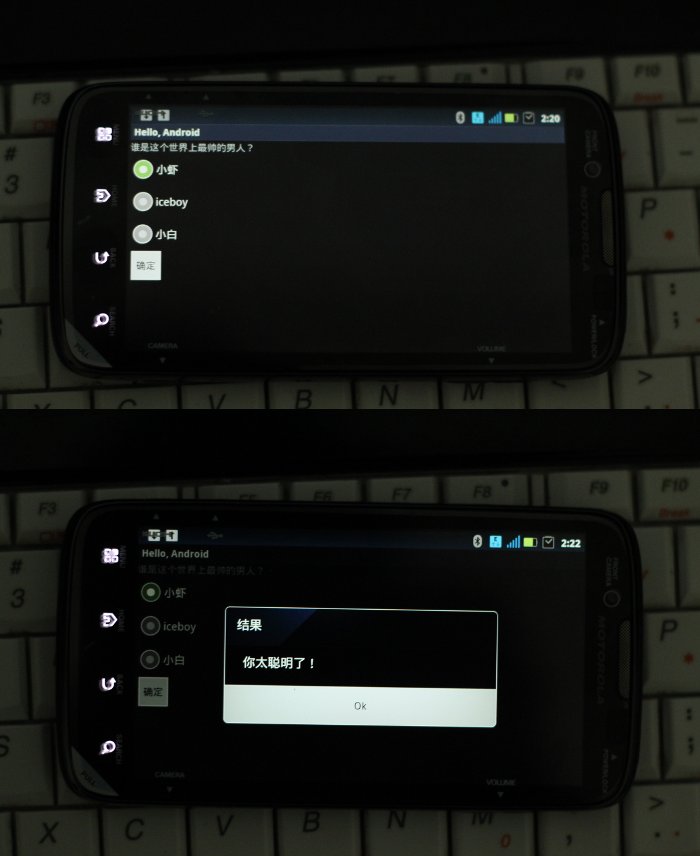
然后,我想试试放在手机上运行。一开始,我在Eclipse的菜单里,通过导出未签名的Package,用蓝牙传输到手机上,运行之后,提示“应用程序未安装”。十分奇怪,难道是因为没有签名???上网查了一下,看来就是这个原因!
我直接复制工程目录下bin下的apk文件到手机上,意料之中,运行成功!
Android-x86运行
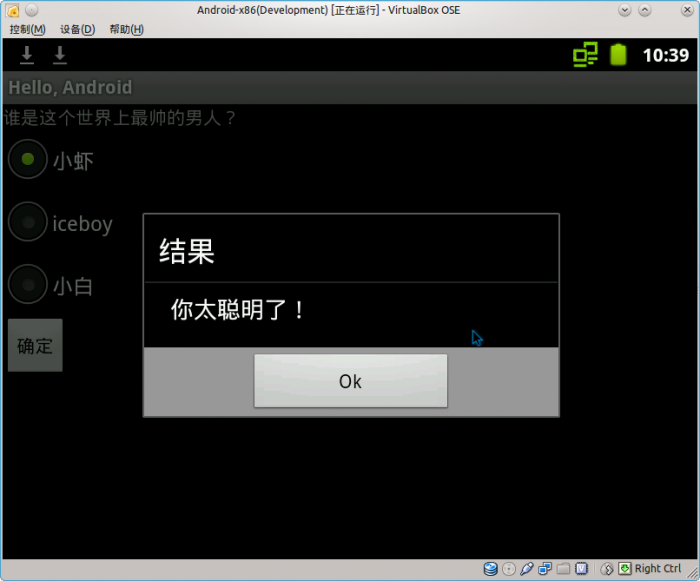
另外,我把apk文件复制到了我的Android-x86虚拟机上!这个Android-x86比起java那个模拟器,速度相差太大了。大家可以看看:
java模拟器CPU一直是100%,导致我的笔记本风扇一直在高速运转。而在VirtualBox的Android-x86只用了1%的CPU。相差甚远!另外,Android-x86的开机速度非常之快。不过,我还是习惯使用Virtualbox的休眠功能,连开机过程都免了。
因为我还没有配置好Eclipse与虚拟机的连接,所以我这里用了另外一种方法来复制文件到x86的虚拟机里。非常实用!!!
在终端里切换到apk所在的目录下,然后运行
root@xiaoxia-pc:/java/HelloAndroid/bin# python -m SimpleHTTPServer
Serving HTTP on 0.0.0.0 port 8000 ...
然后在虚拟机的Android里,输入网址 http://192.168.56.1:8000/
Android-x86里的运行效果:


