人脸识别准备 -- 基于raspberry pi 3b + movidius - wlu - 博客园
- -最近准备系统地学习一下深度学习和TensorFlow,就以人脸识别作为目的. 十年前我做过一些图像处理相关的项目和研究,涉及到图像检索. 记得当时使用的是SIFT特征提取,该特征算子能很好地抵抗图像旋转、仿射变换等变化. 可以说SIFT是图像特征工程方面做得很出色的算子. 现如今深度学习特别是CNN,ResNet等模型被研究者发明之后,图像特征工程似乎已经很“没有必要”了.
最近准备系统地学习一下深度学习和TensorFlow,就以人脸识别作为目的。
十年前我做过一些图像处理相关的项目和研究,涉及到图像检索。记得当时使用的是SIFT特征提取,该特征算子能很好地抵抗图像旋转、仿射变换等变化。可以说SIFT是图像特征工程方面做得很出色的算子。
现如今深度学习特别是CNN,ResNet等模型被研究者发明之后,图像特征工程似乎已经很“没有必要”了。深度神经网络通过多层表示能够更抽象地表示图像的特征(称作embedding)。
在人脸识别也得益于深度学习,其中facenet的性能非常出色。facenet基于triplet loss训练模型输出128维embedding。训练时准备M个人,每个人N张图像,目标使得同一个人的不同人脸的embedding距离尽量小,而不同人的人脸图像的embedding尽量大。
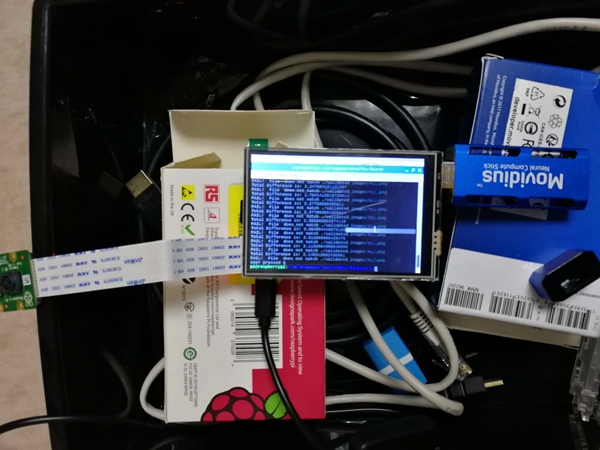
本文将描述基于raspberry 3B + movidius作为硬件平台,TensorFlow facenet作为模型实现人脸识别。后续将基于这套edge computing做一套完整的人脸识别系统,例如考勤系统。
本文将 不涉及在线人脸检测过程。
当前的系统:
      pi@raspberrypi:~ $ uname -a
Linux raspberrypi 4.14.34-v7+ #1110 SMP Mon Apr 16 15:18:51 BST 2018 armv7l GNU/Linux
相关外设:
首先在raspberry上安装TensorFlow。目前raspberry上预装了python2.7和python3.5.我们选择python3.5.
从https://github.com/lhelontra/tensorflow-on-arm/releases下载tensorflow-1.3.1-cp35-none-linux_armv7l.whl并安装:
pip3 install tensorflow-1.3.1-cp35-none-linux_armv7l.whl
可能需要pip3一些别的:
      # numpy issue
sudo apt-get install libatlas-base-dev
# opencv cv2
pip3 install opencv-python
sudo apt-get install libjpeg-dev libtiff5-dev libjasper-dev libpng12-dev

pip3 install sklearn
pip3 install scipy
# qt issue
sudo apt-get install libqtgui4 libqt4-test
测试:
      pi@raspberrypi:~ $ python3
Python 3.5.3 (default, Jan 19 2017, 14:11:04)
[GCC 6.3.0 20170124] on linux
Type "help", "copyright", "credits" or "license" for more information.
>>> import tensorflow
>>> tensorflow.__version__
'1.3.1' 有了TensorFlow之后我们可以编译facenet并在pi上运行。https://github.com/davidsandberg/facenet/tree/tl_revisited
基于模型20170512-110547运行compare.py来比较多张图像中人脸的距离。发现速度非常慢。
具体说,首先检测图像中的人脸,这里运行了mtnet网络,然后再通过facenet网络inference。单独测试inference的时间开销20+秒(inference时人脸图像都是160x160)。相比之下用dlib的开销在2秒左右。这样的性能很让人沮丧?
为了将facenet进行到底,我选择加速,movidius是神经计算神器,inference速度非常快。
clone代码 git clone -b ncsdk2 https://github.com/movidius/ncsdk.git
因为我们事先安装了TensorFlow,所以修改ncsdk.conf,不再安装TensorFlow,但是还需要caffe
      INSTALL_DIR=/opt/movidius
INSTALL_CAFFE=yes
CAFFE_FLAVOR=ssd
CAFFE_USE_CUDA=no
INSTALL_TENSORFLOW=no
INSTALL_TOOLKIT=yes
PIP_SYSTEM_INSTALL=no
VERBOSE=yes
USE_VIRTUALENV=no
#MAKE_NJOBS=1
make install
clone代码: git clone -b ncsdk2 https://github.com/movidius/ncappzoo.git
在tensorflow/facenet下,根据README一步一步编译。最终得到facenet_celeb_ncs.graph文件,这个文件是movidius识别的图模型文件。
这里我先不考虑在线人脸检测。先准备一张照片,离线人脸检测并保存人脸图像作为比对目标。先以一张人脸为例,多个人脸图像其实是一样的。
在线检测时我们将摄像头的resolution设置小一些,例如280x280。在线识别是,人脸尽量靠近摄像头,这样可以认为这张照片就是人脸照片。或者也可以限定人脸在显示屏上给定的一个区域。
目前inference的速度~100ms,当前对ncs还不是很了解,待进一步研究后再优化。
代码如下(保存在ncappzoo/tensorflow/facenet)
VALIDATED_IMAGES_DIR + '/my1.png'是一张人脸图像,通过人脸检测得到后保存的结果 #! /usr/bin/env python3
import sys
sys.path.insert(0, "../../ncapi2_shim")
import mvnc_simple_api as mvnc
import numpy
import cv2
import sys
import os
from picamera.array import PiRGBArray
from picamera import PiCamera
import time
# initialize the camera and grab a reference to the raw camera capture
camera = PiCamera()
camera.resolution = (280, 280)
camera.framerate = 32
rawCapture = PiRGBArray(camera, size=(280, 280))
frame_name=''
EXAMPLES_BASE_DIR='../../'
IMAGES_DIR = './'
VALIDATED_IMAGES_DIR = IMAGES_DIR + 'validated_images/'
validated_image_filename = VALIDATED_IMAGES_DIR + 'my1.png'
GRAPH_FILENAME = "facenet_celeb_ncs.graph"
# name of the opencv window
CV_WINDOW_NAME = "FaceNet"
# the same face will return 0.0
# different faces return higher numbers
# this is NOT between 0.0 and 1.0
FACE_MATCH_THRESHOLD = 1.2
# Run an inference on the passed image
# image_to_classify is the image on which an inference will be performed
# upon successful return this image will be overlayed with boxes
# and labels identifying the found objects within the image.
# ssd_mobilenet_graph is the Graph object from the NCAPI which will
# be used to peform the inference.
def run_inference(image_to_classify, facenet_graph):
# get a resized version of the image that is the dimensions
# SSD Mobile net expects
resized_image = preprocess_image(image_to_classify)
# ***************************************************************
# Send the image to the NCS
# ***************************************************************
facenet_graph.LoadTensor(resized_image.astype(numpy.float16), None)
# ***************************************************************
# Get the result from the NCS
# ***************************************************************
output, userobj = facenet_graph.GetResult()
return output
# overlays the boxes and labels onto the display image.
# display_image is the image on which to overlay to
# image info is a text string to overlay onto the image.
# matching is a Boolean specifying if the image was a match.
# returns None
def overlay_on_image(display_image, image_info, matching):
rect_width = 10
offset = int(rect_width/2)
if (image_info != None):
cv2.putText(display_image, image_info, (30, 30), cv2.FONT_HERSHEY_SIMPLEX, 0.5, (255, 0, 0), 1)
if (matching):
# match, green rectangle
cv2.rectangle(display_image, (0+offset, 0+offset),
(display_image.shape[1]-offset-1, display_image.shape[0]-offset-1),
(0, 255, 0), 10)
else:
# not a match, red rectangle
cv2.rectangle(display_image, (0+offset, 0+offset),
(display_image.shape[1]-offset-1, display_image.shape[0]-offset-1),
(0, 0, 255), 10)
# whiten an image
def whiten_image(source_image):
source_mean = numpy.mean(source_image)
source_standard_deviation = numpy.std(source_image)
std_adjusted = numpy.maximum(source_standard_deviation, 1.0 / numpy.sqrt(source_image.size))
whitened_image = numpy.multiply(numpy.subtract(source_image, source_mean), 1 / std_adjusted)
return whitened_image
# create a preprocessed image from the source image that matches the
# network expectations and return it
def preprocess_image(src):
# scale the image
NETWORK_WIDTH = 160
NETWORK_HEIGHT = 160
preprocessed_image = cv2.resize(src, (NETWORK_WIDTH, NETWORK_HEIGHT))
#convert to RGB
preprocessed_image = cv2.cvtColor(preprocessed_image, cv2.COLOR_BGR2RGB)
#whiten
preprocessed_image = whiten_image(preprocessed_image)
# return the preprocessed image
return preprocessed_image
# determine if two images are of matching faces based on the
# the network output for both images.
def face_match(face1_output, face2_output):
if (len(face1_output) != len(face2_output)):
print('length mismatch in face_match')
return False
total_diff = 0
for output_index in range(0, len(face1_output)):
this_diff = numpy.square(face1_output[output_index] - face2_output[output_index])
total_diff += this_diff
print('Total Difference is: ' + str(total_diff))
if (total_diff < FACE_MATCH_THRESHOLD):
# the total difference between the two is under the threshold so
# the faces match.
return True
# differences between faces was over the threshold above so
# they didn't match.
return False
# handles key presses
# raw_key is the return value from cv2.waitkey
# returns False if program should end, or True if should continue
def handle_keys(raw_key):
ascii_code = raw_key & 0xFF
if ((ascii_code == ord('q')) or (ascii_code == ord('Q'))):
return False
return True
# start the opencv webcam streaming and pass each frame
# from the camera to the facenet network for an inference
# Continue looping until the result of the camera frame inference
# matches the valid face output and then return.
# valid_output is inference result for the valid image
# validated image filename is the name of the valid image file
# graph is the ncsdk Graph object initialized with the facenet graph file
# which we will run the inference on.
# returns None
def run_camera(valid_output, validated_image_filename, graph):
frame_count = 0
cv2.namedWindow(CV_WINDOW_NAME)
found_match = False
for frame in camera.capture_continuous(rawCapture, format="bgr", use_video_port=True):
# grab the raw NumPy array representing the image, then initialize the timestamp
# and occupied/unoccupied text
vid_image = frame.array
test_output = run_inference(vid_image, graph)
if (face_match(valid_output, test_output)):
print('PASS! File ' + frame_name + ' matches ' + validated_image_filename)
found_match = True
else:
found_match = False
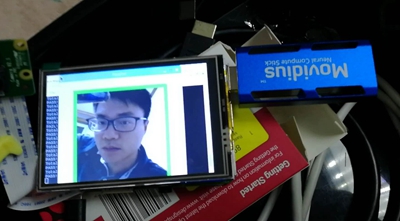
print('FAIL! File ' + frame_name + ' does not match ' + validated_image_filename)
overlay_on_image(vid_image, frame_name, found_match)
# check if the window is visible, this means the user hasn't closed
# the window via the X button
prop_val = cv2.getWindowProperty(CV_WINDOW_NAME, cv2.WND_PROP_ASPECT_RATIO)
if (prop_val < 0.0):
print('window closed')
break
# display the results and wait for user to hit a key
cv2.imshow(CV_WINDOW_NAME, vid_image)
raw_key = cv2.waitKey(1)
if (raw_key != -1):
if (handle_keys(raw_key) == False):
print('user pressed Q')
break
# show the frame
#cv2.imshow("Frame", image)
key = cv2.waitKey(1) & 0xFF
# clear the stream in preparation for the next frame
rawCapture.truncate(0)
# if the `q` key was pressed, break from the loop
if key == ord("q"):
break
# This function is called from the entry point to do
# all the work of the program
def main():
# Get a list of ALL the sticks that are plugged in
# we need at least one
devices = mvnc.EnumerateDevices()
if len(devices) == 0:
print('No NCS devices found')
quit()
# Pick the first stick to run the network
device = mvnc.Device(devices[0])
# Open the NCS
device.OpenDevice()
# The graph file that was created with the ncsdk compiler
graph_file_name = GRAPH_FILENAME
# read in the graph file to memory buffer
with open(graph_file_name, mode='rb') as f:
graph_in_memory = f.read()
# create the NCAPI graph instance from the memory buffer containing the graph file.
graph = device.AllocateGraph(graph_in_memory)
validated_image = cv2.imread(validated_image_filename)
valid_output = run_inference(validated_image, graph)
run_camera(valid_output, validated_image_filename, graph)
# Clean up the graph and the device
graph.DeallocateGraph()
device.CloseDevice()
# main entry point for program. we'll call main() to do what needs to be done.
if __name__ == "__main__":
sys.exit(main())